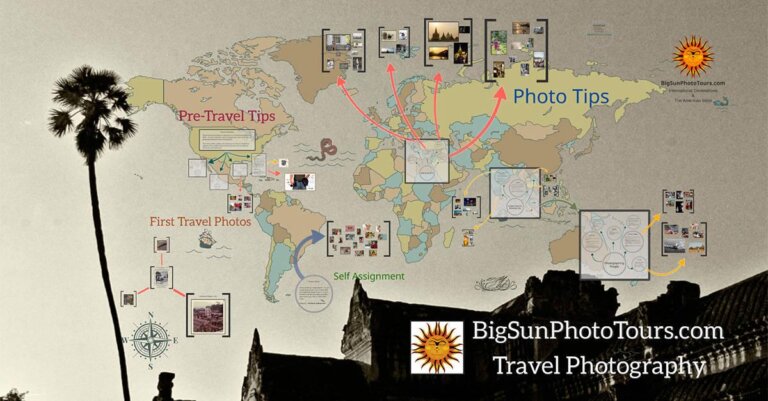
My photography tour clients get all these travel photography tips “in the field” during my tours to South East Asia and other locals, but I thought I might as well share some of this information here on the website for everyone to benefit.
The written version is great for scanning out specific information. It is also a good bit more detailed than the visual presentation. On the flip side, the visual presentation uses images from all over SE Asia to demonstrate various skills/tips/examples. This is quite useful in understanding some of the information. What the heck,,, just read/watch them both.
I guarantee there is something useful in there for everyone, be they beginners or world travelers in their own right.
NOTE: To view the presentation full screen select the square icon in the lower right corner (appears once presentation loads).
Better Photos Through Prior Preparation!
Please note that everyone’s experiences, skills, photographic style and more differ. As such some of these travel photography tips will not apply to your own experience or preferred method of travel. Take all tips with a grain of salt knowing that they are simply the opinion myself (Gene Tewksbury) and have worked well within my own experience.
Pre-Trip Paperwork: The least fun part of your journey.
- VISA:
- Make sure you understand your visa terms.
- Example: In Thailand you are granted a 30 day stay when arriving by plane BUT only 15 days when crossing a land border. This can make a wreck of your plans if you are not aware.
- There are many VISA services and information websites out there, but you should always check with an actual embassy to ensure correct information.
- Make sure you understand your visa terms.
- Passport:
- Make certain you have six months left on your passport. Many countries require this for entry.
- Credit Cards:
- Notify CC companies where you are going prior to your trip or you might find your card deactivated when you need it most. When CC companies see activity outside your “normal” usage area they often will shut down the card.
- Many places still do not accept credit cards so prepare for that fact.
- Many countries add high fees to any CC transaction. This can greatly increase your expenses.
- Insurance:
- Make sure your equipment/homeowners insurance covers your equipment when outside the country. Many will not.
- Know the requirements for a claim. You may need a local police report or other documentation of the loss.
- Contact List:
- Bring your important contacts (people, banks, CC’s, etc) in some form you can access if you’re computer/wallet/phone are lost or stolen.
- I print in “ultra small” print, a list on paper which I fold into a small square in my wallet.
- I use fake names to represent banks, CC’s and financial contacts so as not to give a wallet thief any more help than necessary.
- Are you Driving?
- Check to ensure you are not required to have an international drivers license?
Research (before you leave):
“PRIOR preparation prevents poor performance…… and makes better photos”
- Look for possible subjects in advance:
- Google Images > type in destination > Images > browse images for subjects you didn’t know about.
- Research how those new destinations might fit into your travel plans.
- Forums:
- Find destination specific forums: Example: Photo clubs for your destination.
- Ask locals about lesser known places that might be worth your effort to shoot.
- There are photography forums for everywhere now.. and those photographers will usually have great advice on places and events to shoot along with suggestions of when and how to shoot it.
- Google Images > type in destination > Images > browse images for subjects you didn’t know about.
- Maps: Look at maps before you arrive (and while you’re there). For every “iconic spot” you found via internet or lonely planet a good map will show you another set of locations close by that could provide even more interesting images.
- Bus and subway maps are easier to read and use. Plus have the added benefit of showing you the bus/train lines (download as pdf files onto your phone).
- Download Google maps of areas to phone ahead of arrival so you have an “offline” version to access.
- With internet access available, zoom into the area in question (up to 50k each direction).
- Type in “Ok maps” or “okay maps” > save map
- By accessing “My Places” in the Google app you can now bring up your “offline”map.
- Very useful when in countries where maps are simply not available.
- Fixers: If your trip is complex in nature and/or you just have the resources to do so, hiring a fixer can be of great help. A fixer is someone who gets information and makes things happen. Like a wedding planner for traveling photographers.
Research (on location):
- Local Media: Be sure to read local papers, newscasts, etc to find out what “local” events are happening. That’s where you can find true local culture and unique photo opportunities. Most “non-tourist” events will never appear in your web research.
- Example: When I was in Bangkok during the latest government protests I was able to know where specific events/protests/speeches would occur by checking local media. It also helped me to know what areas to avoid due to excessive violence.
- Sporting events
- Sports are integral to all cultures.
- Sporting events offer much more than just the athletes themselves.
- Cultural norms
- Music / Anthems
- Betting
- Social interaction
- Iconic Buildings (times & closures) – Churches, buildings, temples very often are being renovated or under some type of construction. Before going to visit, try and look ahead via web to see if they are fully open.
- Bars: The easiest way to get an in-depth conversation with a local is to sit at a bar. They have nothing better to do than tell you about interesting locations to visit that you won’t find in a travel guide.
- Buy a local a drink – best money you can spend for research.
Equipment: (Travel Light,, Light,,, Light)
- Carry On Only: This is not suitable for everyone or all occasions, but I travel with carry on luggage only. This includes all clothing, bathroom stuff, camera gear and accessories.
- IF you are unable to do this, then make certain ALL camera gear resides in a single “case” of some kind so that you keep your camera gear on your person.
- You don’t need your Bahama shorts or toiletries to take photos, but you do need your camera and lenses. They can’t lose your equipment if it’s not in your luggage.
- Super Light carry bag: A trick I like to use is to bring a super light backpack (nylon day pack with no frame). It can roll up like a t-shirt. If you run into carry on restrictions (especially with local flights), you can transfer a significant portion of your pack’s contents into the day bag. Now that goes under your seat and the pack becomes an acceptable carry on size/weight.
- IF you are unable to do this, then make certain ALL camera gear resides in a single “case” of some kind so that you keep your camera gear on your person.
- Camera Gear:
- I personally bring [ body, 16-35mm, 28-300m, speed light, ND Filter/Pol Filter, lens cloth, sensor cleaning stick (pre-moistend solution), extension tube, battery charger/x-battery, SD-cards, cheap rain bag.
- To carry the gear I have a single padded case which fits in my backpack. While out shooting I carry the camera and main zoom on a sling, with speed light and wide angel in belt pockets. The little stuff I just keep in a small fanny pack.
- My #1 concern personally is size/weight. I must be able to move freely, quickly and for long periods so for my personal style of photography minimizing gear trumps variety and quality (ie: fast high end lenses).
- There is no right or wrong equipment. It depends on subject matter, your shooting style, how much you travel on location, etc etc. So no point in my discussing equipment further than that.
Improving Your Travel Photography
Getting the Shot:
- Travel slow:
- Attempting to pack in as much as possible within your trip often means you have truly “seen and experienced” nothing.
- It’s better to show ten photos that are great than diluting them with 90 more that are average.
- So it is that you’ll create better photos (and have deeper experiences) if you only visit three destinations for 3 days each than nine destinations for a day each.
- Attempting to pack in as much as possible within your trip often means you have truly “seen and experienced” nothing.
- Wait for the moment:
- You see a potentially great image “if only X”… If there is a probability “x” may happen wait for it.
- For instance if you are photographing a beautiful Buddhist alter but you feel the image would benefit from having someone in the photo praying. Take the time to sit down and wait for that to occur. Do not just say “too bad, it would have been cool” and move on.
- Did you find a great location/shot but lighting or environment just was not right. If it’s a true winner don’t be afraid to return to it again and get it right.
- Stake out your shot well in advance for “one time” events (sunset, sunrise, parade event, etc) as you will likely not be the only photographer and they will grab the sweet spots.
- You see a potentially great image “if only X”… If there is a probability “x” may happen wait for it.
- Shooting from the vehicle:
- Always have camera ready when in a vehicle, boat or other transport. Time spent traveling to/from a location is not wasted time, you are passing a lot of great material along the way.
- If possible keep the window down.
- Pre-set your shutter speed appropriately for fast exposure.
- Set A/F to Continuous servo as subjects will be in constant motion (in relation to you).
- Separate interior and exterior shoot times:
- External architecture, landscapes, etc (outdoor stuff) you will want to photograph in the best light you can (generally dawn and dusk). We all know this basic concept and it’s no different when you are traveling.
- Try and schedule your activities so that you cover “indoor locations” in the middle of the day!
- Example: You are visiting a large church for exterior photos in the morning. You do not have to go inside at that time just because you happen to be there. Use your good light to continue on to other exterior locations. Return to the interiors later in the day making the most of your limited good light.
- This may require using more time, covering more distance and thus see fewer locations. That’s OK! Better to have a few great photos than many mediocre ones.
- Walk walk walk:
- Take taxis and transport as little as possible since the good stuff is usually something you stumble upon.
- Explore randomly: (in my opinion the #1 best advice I can give you)
- The vast majority of my favorite images come from random exploration. I never schedule my time fully with specific destinations leaving plenty (usually 1/3-1/2 of my time) to just pick a random location and explore alleys, markets and neighborhoods. This is where “real” life is happening, where daily culture is found. Not at tourist traps and cultural demonstrations.
- You will generally find the best images at dawn and after dark – not for the preferred lighting but because that is when people are living their lives outside the daily work schedule.
Subject Specific Tips:
- Supporting Photos:
- It’s often nice to take photos that are not really “stand alone” images, but help tell the “story” of the locations you have traveled.
- Examples might be everyday things that differ from those where you live (food, traffic, advertising, markets, etc)
- It’s often nice to take photos that are not really “stand alone” images, but help tell the “story” of the locations you have traveled.
- Temples and Architecture.
- Consider getting a few “big” shots as posterity shots (I was here). Then you can put your effort into shooting intriguing portions of the building, which when viewed in a series, really tell the story of this building.
- Shooting just a big all encompassing wide angel deprives you of the details that probably make the building interesting in the first place (statues, tiles, doorways, windows, etc).
- Panoramas: If you do not have a “super wide” lens capable of capturing the entire space (interior or exterior) consider doing a panorama. Keep in mind panoramas do not have to be simple horizontal stitches. You can stitch vertically and even with multiple levels combining both vertical and horizontal stitches.
- Removing People from a Scene:
- ND Filters: You can use a ND filter if it’s strong enough or ambient light is not too bright. You are attempting to reduce enough light to force a very long exposure. If long enough, you can eliminate people from the image assuming they stay in motion and don’t just stand there.
- Composites: To remove unwanted persons from your image, photograph (preferably from tripod) multiple instances of the same image as people move in/out of the scene … the idea is to get one photo that has each portion of the building without a person in it.
- If you don’t use tripod make sure to mark a location on the building with your single focus point and just keep that point on the same location.
- In PS you can now easily composite the building together into a single perfect image free from distracting tourists wandering throughout your scene.
- This method also works well when photographing interiors in popular locations.
- When shooting panoramas, composites or HDRs…. use your hand to “bookend” the front and back of the series so you can ID it in post as a group.
- Consider getting a few “big” shots as posterity shots (I was here). Then you can put your effort into shooting intriguing portions of the building, which when viewed in a series, really tell the story of this building.
- Statues:
- They are everywhere, lovely and say a lot about a culture and its history.
- Tackle them exactly as you would any portrait unless it’s environment adds to the composition. In such cases I recommend still taking photos both way (environment and portrait).
- Poverty:
- Often a very poignant and visible part of many cultures.
- Most often thought of as portraits of the poor, but don’t forget poverty can be shown indirectly as well through imagery of the environment in which they live.
- Look for cause and effect of poverty.
- Look for contrast of status (rich/poor in proximity)
- Don’t treat a beggar any differently than you would any other person. Give them the respect and courtesies you would anyone else as described in “capturing people” below.
- Capturing People:
- Be Nice!
- SMILE SMILE SMILE SMILE.
- Talk with the subject. Actually be friendly for more than 2 seconds. It is not only courteous but often will give you a much better story to accompany your image.
- I don’t speak the language… what do I do?
- You’ve played Charades, right?
- Try holding the camera up with a questioning look?
- Show them the shot – really good for kids. Once you’ve shared the photo with them, they often will let you take even more….
- Make Cards: Create business cards that say who you are and explaining that if they want to get a copy of the photograph that they should contact you and you will provide it to them free. Do this in Their language. How much is a 100 pack of cheap business cards? $10 max (free from VISTA print – www.vistaprint.com)… is that too much to spend to really connect with your subject? To enhance the experience (thus probably enhancing your photos),, and just to be a nice person.
- Know a little about the local culture:
- Take the time to learn some of their basic customs. This not only shows respect to them but prevents you from inadvertently offending them. Once you’ve offended someone it’s not likely they will be helpful concerning your photography.
- Thailand Examples:
- Don’t point your feet at people. Keep this in mind if you tend to cross your legs when sitting.
- Never touch someone on their head.
- Women should not touch a monk.
- Never speak ill of the king. It’s best not to test where this line is. Say good things or nothing at all.
- Thailand Examples:
- Learn some basic words. This can go a VERY long way to breaking down barriers for taking photos.
- If nothing else always learn “may I”, “thank you”, “hello/goodbye” and “beer”. 🙂
- Take the time to learn some of their basic customs. This not only shows respect to them but prevents you from inadvertently offending them. Once you’ve offended someone it’s not likely they will be helpful concerning your photography.
- On the Job: Photographing people as they do their various jobs ads context and information to the image.
- Try and wrap it up in a few seconds… this is not a paid photo shoot… Don’t take advantage of peoples good nature:
- Shoot in continuous mode to increase your chance of the “right expression”, open eyes, etc without using up too much of their time.
- Vendors:
- They make great subjects and location, but remember they are working and having you in their “space” may even interfere with their business.
- Try buying something small and cheap first (example: food item) and drop a couple pleasantries. THEN ask if you can start shooting them and their store. You can often get free reign to photograph them as they do their work if you have already made yourself a customer.
- Crafts-persons:
- People who create something are artists at heart no matter what they are creating. As such they likely take pride in their craft and enjoy showing it off.
- Ask them to show you how they make their ware, pose with it, get unique closeups of them demonstrating something.
- I’m not a fan of paying for images, but when you are using someone’s time and possibly interfering with their livelihood, especially when they are trying to make a living, I consider it more of an exchange of services. I am trying to get something from them, why should they not receive something in return. This is a situational decision and can only be made by you based on circumstance.
- “De-emphasize your equipment.
- Try not to look too important or professional else people will want to know why you want their image and what you intend to use it for.
- Take off lens hood.
- Take off battery grips.
- Don’t have all your gear on you (assuming you ignored my advice about equipment earlier).
- Try not to look too important or professional else people will want to know why you want their image and what you intend to use it for.
- Getting Candid Images: I personally prefer candid photos where the subject never knows I’ve taken a photo in the first place. I understand that does not often make a good portrait, but my interests lie in editorial style and subject matter so it works for me.
- Methods for candid shots:
- Shoot from a resting position – Rest the camera on something or in your lap while sitting.
– Compact Pocket cameras work exceptionally well for this as they are quiet, discreet and have a huge DOF - Mirrors – Some locations have mirrors or other reflective objects which you can use to photograph people while not even pointing the camera in their direction.
- Shooting from the hip
- Think about focal length – the wider the focal length the easier it is to aim/frame and the deeper your depth of field, thus making focus a great deal easier as well.
- Think about DOF – using higher f-stops will increase depth of field and make focus easier.
- Think about camera settings ahead of time.
- Example: say you are entering a market place. Take some test shots to determine the best settings for the situation prior to walking further around the market so you are ready as soon as you see an opportunity.
- Practice at home – This sort of shooting takes a lot of practice to get good, so don’t start practicing when it counts. Practice at home before you travel.
- Long focal lengths – this is pretty straight forward. If you have a large focal length you can effectively shoot from much farther away taking yourself out of the subject’s attention.
- Nat Geo method of living with people is clearly the best option,, but we can’t all do that can we?
- Shoot from a resting position – Rest the camera on something or in your lap while sitting.
- Methods for candid shots:
- Be Nice!
Find a purpose / story for your trip.
Instead of randomly collecting pretty pictures.. Try and focus your efforts on a specific topic. Give yourself an “assignment”. You will certainly produce a more meaningful and significant body of work, but you will also find that you enjoy your trip even more, learn more, experience more.
Copyright: Big Sun Photography llc. | 303-880-0048 | www.BigSunPhototours.com
Additional Random Travel Photography Tips
- Photography:
- Solidify your weak skill sets: If there are areas of your camera or photography you are not comfortable with. Don’t wait until a week before your trip to try and take lessons or tackle the issue. Practice and learn well in advance.
- A big trip is not the time to start learning your camera. It is your big moment to implement your skills.
- Photograph signs everywhere you go… so you can remember where you were and their names.
- Carry a note pad: Write the name of location > take photo > now you have all your relevant information about imagery you have taken in chronological order within LR. Makes it super easy to organize, keyword and add meta data.
- Solidify your weak skill sets: If there are areas of your camera or photography you are not comfortable with. Don’t wait until a week before your trip to try and take lessons or tackle the issue. Practice and learn well in advance.
- Currency: Don’t exchange in America.. you’ll loose too much. Much better rates at the destination airports.
- Some countries you’ll do best at banks within the city. Ask around in a forum.
- Food: When eating from the street pick items that go into the oil. You can always ask them to re-drop it into the oil.
- Carry baby whips: Toilet paper is far from guaranteed. Whips double as hand cleaners as well.
- Theft:
- Try and avoid showing off your brand name. Use gaffer tape to cover the name… potential thieves will weight risk if they are not sure what you have, and move on to the next target.
- Don’t have brand name camera strap “Nikon or Canon”.
- Clothing: make sure you are using clothing appropriate for your destination.
- For SE Asia (or any hot climate) that means:
- Quick dry clothing so you can wash and actually be dry the next morning.
- Super light, breathable.
- Shoes that come on/off quickly and easily as you will have to take them off all the time to enter homes, businesses, templates, etc.
- Pockets pockets pockets.
- Hide your money (money belts / underwear).
- http://www.bullhidebelts.com/ (best money belt you can buy)
- Underwear Options
#Travel Photography Training Tutorial, #travel photography, #travelphotographytutorial, #travelphotographer, #travelphotographytraining, #travelphotographytips, #phototutorials, #photographytutorials, #travelphotographytips,
2021 Tour Discounts
$250 off 2021 Asia tours for the first four signups.
Check out upcoming photography tours to South East Asia.
Side Note: A while back I was honored to present this information in a speech before the Colorado Photography Festival in Golden Colorado. The symposium will had a wide variety of photographers lecturing on topics from night photography to macro to travel photography (that was my slot).

